
manual floor nailer
Manual Floor Nailers: A Comprehensive Guide
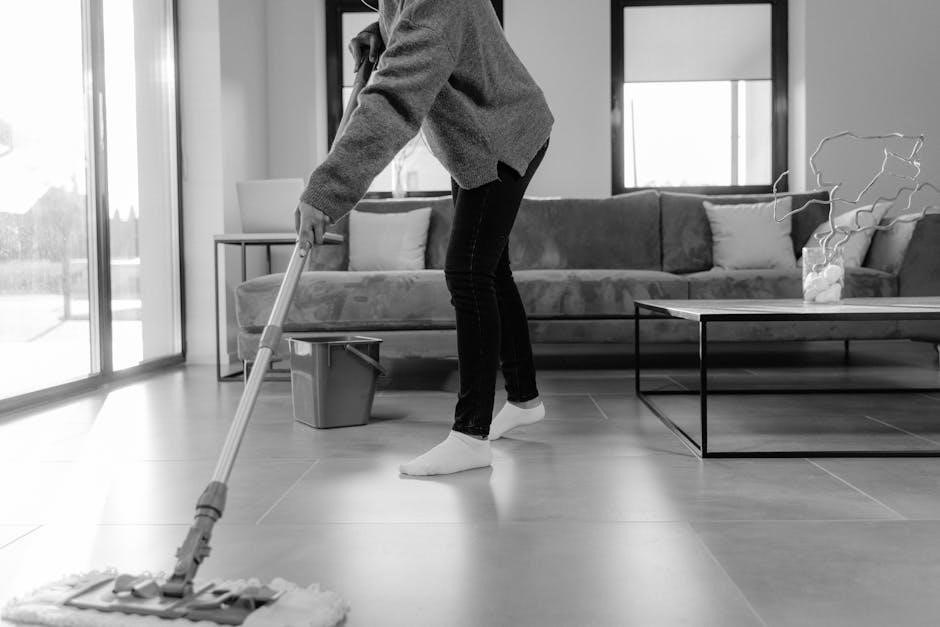
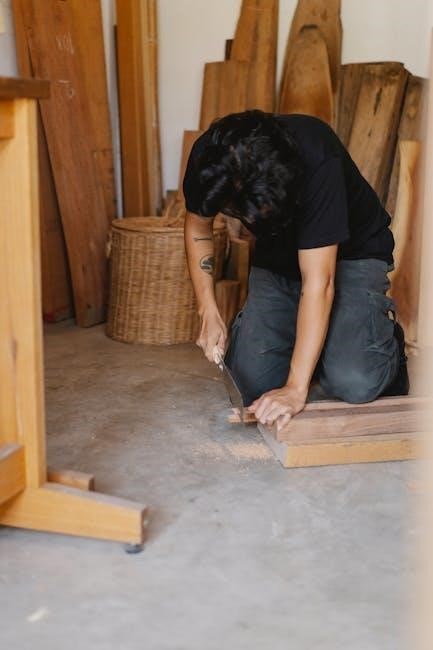
Manual floor nailers are essential tools for installing wood flooring, driving fasteners at the correct angle into the subfloor, ensuring a secure and beautiful installation.
Craftspeople often choose between manual or pneumatic models, with the nailer’s nose hooking onto the tongue of the boards during the process.
Selecting the right nailer is crucial; using a finish nailer is inadequate, as nails will frequently bend and boards won’t hold tightly together.
What is a Manual Floor Nailer?
Manual floor nailers are hand-powered tools specifically designed for installing hardwood flooring. Unlike their pneumatic counterparts, they don’t require an air compressor to operate, relying instead on the user’s physical force to drive nails into the wood. These tools feature a hardened steel head and a striking pad, allowing for precise nail placement with each swing of a mallet.
The nailer’s design incorporates a nose that hooks onto the tongue of the flooring board, ensuring consistent alignment and preventing slippage during installation. This feature is critical for achieving a tight, professional-looking floor. They are favored for smaller projects or situations where portability and the absence of an air compressor are advantageous. Essentially, a manual floor nailer provides a straightforward, reliable method for securing wood flooring directly to the subfloor.
The History of Manual Floor Nailers
The evolution of manual floor nailers mirrors the development of hardwood flooring installation techniques. Early methods relied heavily on hand-nailing, a laborious and time-consuming process prone to inconsistencies. As demand for hardwood floors grew, the need for more efficient tools became apparent.
The first iterations of manual nailers emerged in the early to mid-20th century, offering a significant improvement over hand-nailing. These early models were often heavy and required considerable physical strength to operate. Over time, designs were refined, focusing on ergonomics and ease of use. The core principle – utilizing a striking pad and a nail-guiding nose – remained consistent, but materials and mechanisms evolved.
While pneumatic nailers eventually gained popularity, manual nailers continue to be valued for their simplicity, portability, and affordability, representing a foundational tool in the flooring industry.
Manual vs. Pneumatic Floor Nailers: Key Differences
The primary distinction between manual and pneumatic floor nailers lies in their power source and operation. Manual nailers rely entirely on the user’s physical force – a hammer-like strike delivers the impact to drive the nail. This makes them portable and independent of air compressors or electricity.
Pneumatic nailers, conversely, utilize compressed air to power each nail drive, significantly reducing physical exertion. This allows for faster installation speeds, particularly on larger projects; However, pneumatic nailers require an air compressor, hoses, and a power source, adding to the complexity and cost.
Manual nailers are often preferred for smaller jobs or areas with limited access, while pneumatic options excel in efficiency for extensive flooring installations. The choice often depends on project scale and user preference regarding physical demand.
Advantages of Using a Manual Floor Nailer
Manual floor nailers offer several compelling advantages, particularly for specific projects and users. Their most significant benefit is portability; requiring no power source, they are ideal for remote locations or jobsites lacking electricity or air compressors. This freedom of movement simplifies installations in challenging spaces.
Furthermore, manual nailers are generally more affordable than pneumatic counterparts, making them accessible for DIY enthusiasts or infrequent users. They also demand less setup time, eliminating the need for compressor connections and hose management.
For smaller flooring areas, the controlled force of a manual nailer can be advantageous, allowing for precise nail placement and minimizing the risk of damage to delicate wood flooring. They are a reliable, straightforward option for many installations.
Disadvantages of Using a Manual Floor Nailer
Manual floor nailers, while offering benefits, also present certain drawbacks that installers should consider. The primary disadvantage is the significant physical exertion required. Driving nails manually, especially across a large area, can be incredibly tiring and lead to substantial back strain, potentially causing long-term discomfort or injury.
Compared to pneumatic nailers, manual nailers are considerably slower, increasing project completion time. Achieving consistent nail depth and angle also demands greater skill and precision, potentially resulting in uneven flooring if not executed correctly.
The force needed can also increase the risk of “horseshoeing” – where nails bend over instead of penetrating the wood – requiring rework and potentially damaging the flooring material. Ultimately, the physical demands can make larger projects exceptionally challenging.
Types of Manual Floor Nailers
Manual floor nailers come in several designs, including standard, offset, and mallet-activated varieties, each offering unique features for different flooring installation needs and preferences.
Standard Manual Nailers
Standard manual nailers represent the most traditional approach to hardwood flooring installation, relying entirely on manual force to drive nails securely into place. These nailers typically feature a simple, robust design, consisting of a hardened steel body and a striking pad.
The operator positions the nailer onto the tongue of the flooring board, ensuring correct alignment, and then strikes the pad with a mallet. This direct impact drives the nail at the appropriate angle into both the flooring and the subfloor.
While requiring more physical effort than pneumatic alternatives, standard manual nailers offer excellent control and are particularly well-suited for smaller projects or areas where portability is paramount. They are a cost-effective option, eliminating the need for compressors and hoses, and provide a reliable method for achieving a solid, long-lasting floor installation.
Offset Manual Nailers
Offset manual nailers are a variation of the standard design, engineered to improve accessibility and reduce strain during installation. The key difference lies in the nail pocket, which is intentionally offset from the center of the tool’s head.
This offset allows the user to maintain a more ergonomic hand position, minimizing wrist contortion and fatigue, especially when working in tight spaces or along walls. The design facilitates a more natural swing and striking motion, contributing to increased efficiency and reduced physical stress.
Like standard manual nailers, offset models require a mallet for operation, delivering a focused impact to drive the nail at the correct angle. They remain a popular choice for installers seeking a balance between affordability, control, and user comfort, offering a practical solution for various hardwood flooring projects.
Mallet-Activated Manual Nailers
Mallet-activated manual nailers represent the most common and traditional type of manual floor nailer, relying entirely on the force of a mallet to drive nails. These tools feature a robust, weighted head designed to withstand repeated impacts, and a nail pocket that securely holds the fastener in place.
The operation is straightforward: the nailer is positioned with its nose hooked onto the flooring board’s tongue, and then a mallet is used to strike the padded top of the nailer. This delivers a concentrated force, driving the nail through the flooring and into the subfloor below.
Their simplicity and affordability make them a popular choice for DIY enthusiasts and professionals alike, offering reliable performance and precise nail placement with each strike. They are a cornerstone of hardwood flooring installation.
How to Choose the Right Manual Floor Nailer
Selecting a manual floor nailer requires considering flooring type, nail gauge, handle ergonomics, and material durability for optimal performance and a lasting installation.
Considering Wood Flooring Type
Choosing the correct manual floor nailer hinges significantly on the type of wood flooring you intend to install. Solid hardwood, engineered wood, and bamboo flooring each possess unique densities and thicknesses, demanding specific nailer capabilities.
For instance, harder wood species like oak or maple necessitate a nailer capable of delivering substantial force to drive nails effectively without causing splitting or damage. Softer woods, conversely, require a more delicate approach to prevent mushrooming or bending of the nails.
The thickness of the flooring also plays a vital role; thicker planks generally require longer nails and a nailer designed to accommodate them. Always consult the flooring manufacturer’s recommendations regarding nail size and type to ensure compatibility and a secure, long-lasting floor installation. Ignoring these considerations can lead to installation failures and costly repairs.
Nail Gauge and Length Selection
Selecting the appropriate nail gauge and length is paramount for a successful manual floor nailing project. Nail gauge, referring to the nail’s thickness, impacts its holding power and potential for splitting the wood. Generally, a lower gauge number indicates a thicker nail.
For most hardwood flooring installations, a 16 or 18-gauge nail is commonly recommended, providing a balance between strength and minimizing wood damage. Nail length must adequately penetrate the flooring and securely fasten into the subfloor, typically requiring a length of 1.5 to 2 inches.
Always adhere to the flooring manufacturer’s specifications, as incorrect nail size can compromise the floor’s stability and void warranties. Using nails that are too short results in a weak hold, while excessively long nails can protrude through the subfloor, creating a safety hazard.
Handle Ergonomics and Grip
Handle ergonomics and grip are critical considerations when choosing a manual floor nailer, directly impacting user comfort and reducing strain during extended use. Manual floor installation can be physically demanding, often involving repetitive motions and significant force.
Look for nailers with handles designed to fit comfortably in your hand, featuring a non-slip grip material to ensure a secure hold, even with sweaty palms. A well-designed handle minimizes fatigue and maximizes control, allowing for more accurate nail placement.
Consider the handle’s length and diameter; a longer handle provides greater leverage, while a wider diameter may be more comfortable for larger hands. Prioritizing ergonomic design can significantly reduce the risk of muscle strain and back pain, especially during large flooring projects.
Durability and Material Quality
Durability and material quality are paramount when investing in a manual floor nailer, as these tools endure substantial impact and stress during hardwood flooring installation. A robust nailer constructed from high-quality materials will withstand repeated use and provide long-term reliability.
Look for nailers featuring hardened steel components, particularly in the striking pad and nail guide, to resist wear and tear. The body of the nailer should be made from a durable material, such as cast iron or heavy-duty steel, to prevent bending or cracking under pressure.
A well-built manual nailer represents a long-term investment, saving you money and frustration by minimizing the need for frequent repairs or replacements. Prioritizing quality materials ensures the tool can handle demanding projects and deliver consistent performance.
Installation Process with a Manual Floor Nailer
Proper installation involves preparing the subfloor, positioning the nailer’s nose onto the board’s tongue, and striking the pad with controlled force and precision.
Preparing the Subfloor
A solid subfloor is paramount for a successful hardwood flooring installation using a manual nailer. Before beginning, ensure the subfloor is completely clean, dry, and free of any debris like nails, screws, or old adhesive residue. Any imperfections, such as unevenness, must be addressed; sanding down high spots and filling low areas with a suitable leveling compound are crucial steps;
The subfloor’s structural integrity is also vital. Check for any signs of weakness or damage, and repair or replace compromised sections. A stable and level subfloor provides the necessary foundation for the flooring, preventing future issues like squeaking or movement. Confirm the subfloor is securely fastened to the joists, as this will contribute to the overall stability of the finished floor.
Finally, consider the subfloor material itself; plywood or OSB are common choices, but their condition must be assessed before proceeding with the installation process.
Positioning the Nailer
Precise nailer positioning is key to a professional-looking hardwood floor installation with a manual nailer. Begin by aligning the nailer’s nose securely onto the tongue of the flooring board, ensuring it’s firmly hooked in place. The nailer should be positioned at a consistent distance from the wall, typically leaving an expansion gap as recommended by the flooring manufacturer.
Maintain a straight line by using a chalk line or a straight edge as a guide. This ensures uniform nail placement and prevents the floor from shifting or becoming uneven. Double-check that the nailer is perpendicular to the board, avoiding any angling that could cause the nail to miss the subfloor or damage the tongue.
Proper positioning minimizes the risk of nail bending or “horseshoeing,” a common issue when using manual nailers.
Striking the Nailer Pad
Striking the nailer pad requires a controlled and deliberate motion for optimal results with a manual floor nailer. Use a rubber mallet or a similar tool to deliver a firm, straight blow to the pad, avoiding glancing impacts that can damage the nailer or bend the nail.
The force applied should be sufficient to drive the nail fully into the flooring and subfloor, but not excessive, which could cause the nail to penetrate too deeply or split the wood. Listen for a solid, definitive sound indicating successful nail penetration.
Consistent striking force is crucial for uniform nail depth and a level floor. Avoid rushing this step; accuracy is more important than speed.
Maintaining Consistent Angle and Pressure
Maintaining a consistent angle and pressure is paramount when utilizing a manual floor nailer for a professional-looking installation. The nailer’s base must remain firmly against the flooring tongue throughout each strike, ensuring the nail enters at the correct downward angle.
Avoid tilting the nailer, as this can lead to bent nails or damage to the flooring’s tongue. Apply even pressure while striking; insufficient pressure results in incomplete nail seating, while excessive force risks damaging the wood.
Regularly check the nailer’s alignment and adjust as needed. Consistent technique minimizes errors and contributes to a stable, long-lasting floor.
Maintenance and Care of Manual Floor Nailers
Regular cleaning and lubrication are vital for optimal performance, extending the lifespan of your manual floor nailer and ensuring smooth operation.
Cleaning the Nailer
Consistent cleaning is paramount to maintaining a functional manual floor nailer. After each use, thoroughly remove any wood debris, dust, and residual nail fragments from the nailer’s internal mechanisms and exterior surfaces.
Pay close attention to the nail channel, ensuring it’s free of obstructions that could hinder smooth nail feeding. A small brush or compressed air can be incredibly effective for dislodging stubborn particles.
Inspect the striking pad for wear and tear, cleaning it to maintain optimal impact force. Regularly wiping down the exterior with a clean cloth prevents rust and corrosion, especially if the nailer has metal components.
Avoid using harsh chemicals or abrasive cleaners, as these can damage the nailer’s finish or internal parts. A simple, dry cloth is often sufficient for routine cleaning, preserving the tool’s longevity.
Lubrication
Proper lubrication is vital for the smooth operation and extended lifespan of your manual floor nailer. After cleaning, apply a light coat of oil to the moving parts, focusing on the nail feed mechanism and any pivot points.
A specialized gun oil or a light machine oil works best, ensuring it doesn’t attract excessive dust or gum up the internal components. Avoid using heavy greases, as they can create a sticky residue.
Apply the oil sparingly, using a small brush or applicator to reach tight spaces. Work the mechanism several times to distribute the lubricant evenly, ensuring all moving parts are coated.
Regular lubrication reduces friction, preventing wear and tear and ensuring consistent nail driving performance. This simple maintenance step can significantly improve the nailer’s efficiency and reliability over time.
Nailer Storage
Proper storage is crucial to protect your manual floor nailer from damage and ensure its longevity. Before storing, thoroughly clean the nailer, removing any debris, dust, or residual oil as described in the maintenance section.
Store the nailer in a dry environment, away from moisture and extreme temperatures. A climate-controlled space, like a garage or shed, is ideal. Avoid storing it directly on a concrete floor, as this can promote rust.
Consider using a protective case or bag to shield the nailer from dust and accidental impacts. If possible, store it with the striking pad facing upwards to prevent damage.
Regularly inspect the stored nailer for any signs of corrosion or wear. With proper care, your manual floor nailer will remain a reliable tool for years to come.
Safety Precautions When Using a Manual Floor Nailer
Always wear safety glasses and hand protection while operating a manual floor nailer to prevent injuries; avoid overexertion during prolonged use.
Wearing Safety Glasses
Protecting your eyes is paramount when utilizing a manual floor nailer. The forceful impact of the mallet striking the nailer can potentially cause nail fragments or debris to become airborne. These small particles, though seemingly insignificant, pose a significant risk of causing serious eye injuries, including corneal abrasions or even more severe damage.
High-quality safety glasses act as a crucial barrier, shielding your eyes from these hazards. Ensure the glasses provide a snug and comfortable fit, offering comprehensive coverage around your eyes. Avoid using glasses with scratched lenses, as these can distort vision and compromise protection. Investing in ANSI-approved safety glasses is highly recommended, guaranteeing they meet stringent safety standards.
Remember, eye injuries can have long-lasting consequences. Prioritizing eye protection with safety glasses is a simple yet vital step in ensuring a safe and productive flooring installation process with your manual nailer.
Hand Protection
Protecting your hands is crucial when operating a manual floor nailer, as repetitive striking can lead to discomfort, blisters, and even more serious injuries. The force required to drive nails effectively can cause significant impact stress, potentially damaging the delicate bones and tissues in your hands.
Wearing durable work gloves provides a vital layer of cushioning and support. Choose gloves that offer a secure grip, allowing you to maintain control of the nailer while minimizing the risk of slippage. Gloves also help to absorb some of the shock from each strike, reducing hand fatigue and preventing blisters.
Consider gloves with reinforced palms for added protection against abrasion and impact. Remember, prolonged use of a manual nailer can be physically demanding; prioritizing hand protection is essential for a comfortable and safe working experience.
Avoiding Overexertion
Manual floor nailer operation is physically demanding, and avoiding overexertion is paramount to prevent injuries like back strain and muscle fatigue. Unlike pneumatic nailers, manual models require significant physical effort with each nail driven, potentially leading to rapid exhaustion.
Take frequent breaks to rest and stretch your muscles. Don’t attempt to complete the entire flooring project in one continuous session. Pacing yourself allows your body to recover and reduces the risk of strain. Listen to your body and stop if you experience any pain or discomfort.
Proper technique is also key. Avoid swinging with excessive force; let the weight of the mallet and the nailer do the work. Remember, a previous installer experienced severe back stiffness, highlighting the importance of mindful effort and adequate rest.

Troubleshooting Common Issues
Common problems include nails bending (horseshoeing), difficulty driving nails fully, and nailer jamming; addressing these promptly ensures a smooth and successful flooring installation process.
Nails Bending or Horseshoeing
Nail bending, often called “horseshoeing,” is a frequent issue encountered when using manual floor nailers, and it signifies the nail isn’t penetrating the wood correctly. This typically happens when attempting to use an inappropriate nailer – specifically, a finish nailer instead of a dedicated flooring nailer.
Finish nailers lack the necessary power and design to drive nails at the correct angle and with sufficient force for solid hardwood flooring installation. The nails simply deflect instead of penetrating, resulting in a curved or horseshoe shape.
To resolve this, ensure you are using a flooring nailer designed for the task. Verify the nailer is positioned correctly on the tongue of the flooring board, and apply firm, consistent pressure when striking the nailer pad. Using the correct nail gauge and length is also critical to prevent bending.
Difficulty Driving Nails
Difficulty driving nails with a manual floor nailer often stems from physical exertion, particularly during larger flooring projects. Users may experience significant back stiffness and pain, making continued installation challenging and potentially leading to injury. This is a primary reason why many professionals now favor pneumatic nailers, which require considerably less physical effort.
However, if using a manual nailer, ensure you’re applying sufficient and consistent force when striking the nailer pad. A weak or uneven strike won’t fully seat the nail. Also, verify the subfloor isn’t excessively hard or uneven, as this can impede nail penetration.
Proper technique and pacing are crucial to avoid overexertion and maintain efficiency throughout the installation process.
Nailer Jamming
Nailer jamming, while less common with manual floor nailers compared to pneumatic models, can still occur and disrupt the installation process. This typically happens when nails aren’t feeding correctly through the nailer’s magazine or become misaligned within the driving mechanism. Inspect the nailer’s internal components for obstructions, such as wood debris or bent nails.
Ensure you’re using the correct nail size and type recommended for your flooring and nailer model. Incorrect nails can cause feeding issues and jams. Carefully reload the nailer, ensuring each nail is properly seated in the magazine.
A gentle tap or shake of the nailer might dislodge a minor jam, but avoid excessive force that could damage the tool.