freestyle lite instruction manual
The FreeStyle Lite meter offers virtually pain-free testing and requires no coding, simplifying blood glucose monitoring for users.
This advanced system, detailed in the 2023 user manual, provides comprehensive instructions for accurate results.
Available resources, including the Abbott website and manuals from Internet Archive, support effective meter operation and understanding.
What is the FreeStyle Lite Meter?
The FreeStyle Lite meter is a blood glucose monitoring system designed for ease of use and accurate results. As outlined in the Abbott FreeStyle Freedom Lite User Manual, it’s a compact device enabling individuals to manage their diabetes effectively.
Notably, it eliminates the need for coding, simplifying the testing process. The system, available through retailers like Sinjune, provides a convenient and reliable method for tracking blood glucose levels, supported by extensive online resources.
Key Features and Benefits
Key features of the FreeStyle Lite meter include virtually pain-free testing and its no-coding functionality, streamlining the testing experience. The system, detailed in the owner’s booklet, offers a user-friendly interface and reliable accuracy.
Benefits encompass simplified self-monitoring, convenient data tracking, and access to comprehensive support via the Abbott website. This promotes proactive diabetes management and informed healthcare decisions for users.
Meter Components and Overview
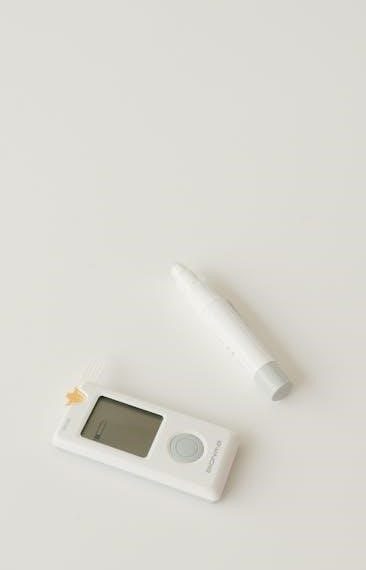
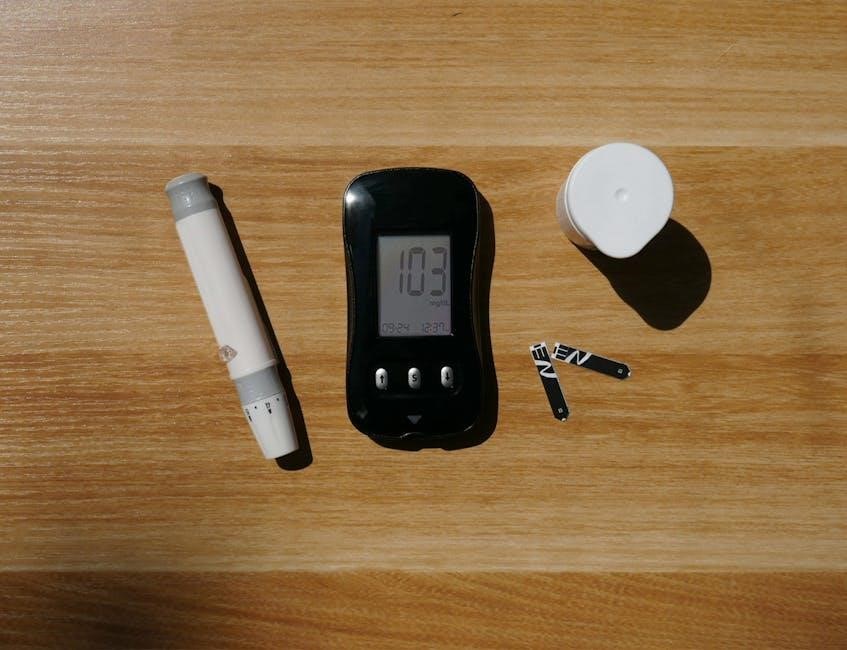
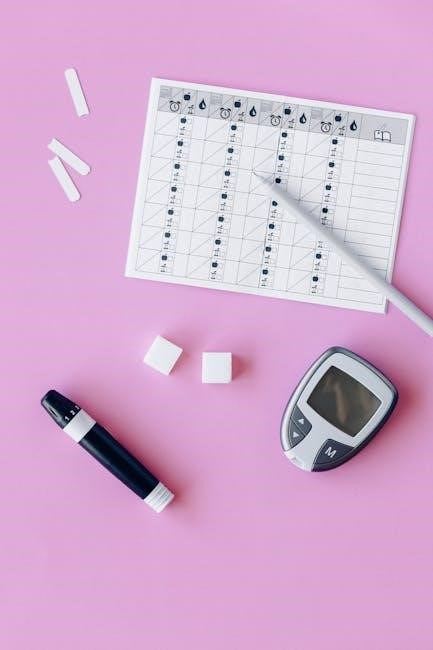
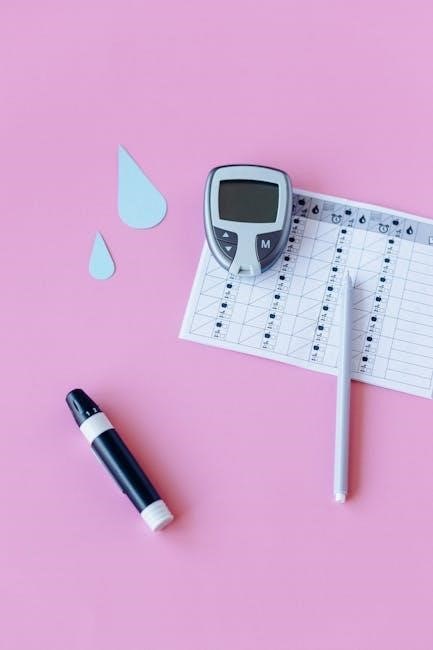
The FreeStyle Lite system includes the meter itself and FreeStyle Lite test strips, working together for accurate readings. Understanding the meter’s display is crucial for interpretation.
Identifying the Meter Parts
The FreeStyle Lite meter features a display screen for result viewing, a button labeled ‘m’ for meter functions like turning it on/off and accessing memory, and a ‘c’ (configure) button.
These buttons facilitate setting date, time, and reminder alarms. The meter accepts FreeStyle Lite test strips, initiating the testing process when inserted. Familiarizing yourself with these components is essential for proper operation, as outlined in the owner’s booklet.
Understanding the Display Icons
The FreeStyle Lite meter’s display utilizes icons to convey crucial information. While specific icon details require referencing the owner’s booklet, the display indicates test results, low/high readings, and meter status.
Understanding these visual cues is vital for interpreting your blood glucose levels accurately. The manual details each icon’s meaning, ensuring users can confidently monitor their health with this system.
Setting Up Your FreeStyle Lite Meter
Initial setup involves inserting a test strip and configuring the date and time. User codes can also be set, as outlined in the provided manual and YouTube tutorials.
Inserting a Test Strip
To insert a test strip, begin with the meter turned off – ensure no strip is already present. Gently remove a FreeStyle Lite test strip from its container, avoiding touching the test area. Insert the strip into the meter until it’s firmly seated, initiating meter activation.
The meter automatically recognizes the strip, eliminating the need for manual coding. This simplifies the testing process, as detailed in the owner’s booklet and online resources.
Configuring Date and Time
To configure the date and time, press and hold the ‘c’ (configure) button on the meter. This initiates the settings menu. Use the meter buttons to navigate and adjust the year, month, day, hour, and minute.
Confirm each setting by pressing the ‘m’ button. Accurate date and time settings are crucial for proper data tracking and review within the meter’s memory functions.
Setting User Codes (if applicable)
The FreeStyle Lite meter allows for setting user codes, enabling multiple individuals to use the same device while maintaining separate test result logs. Access the user code setting through the configuration menu, initiated by pressing the ‘c’ button.
Follow the on-screen prompts to assign a unique code to each user, ensuring accurate data differentiation during memory review and analysis.
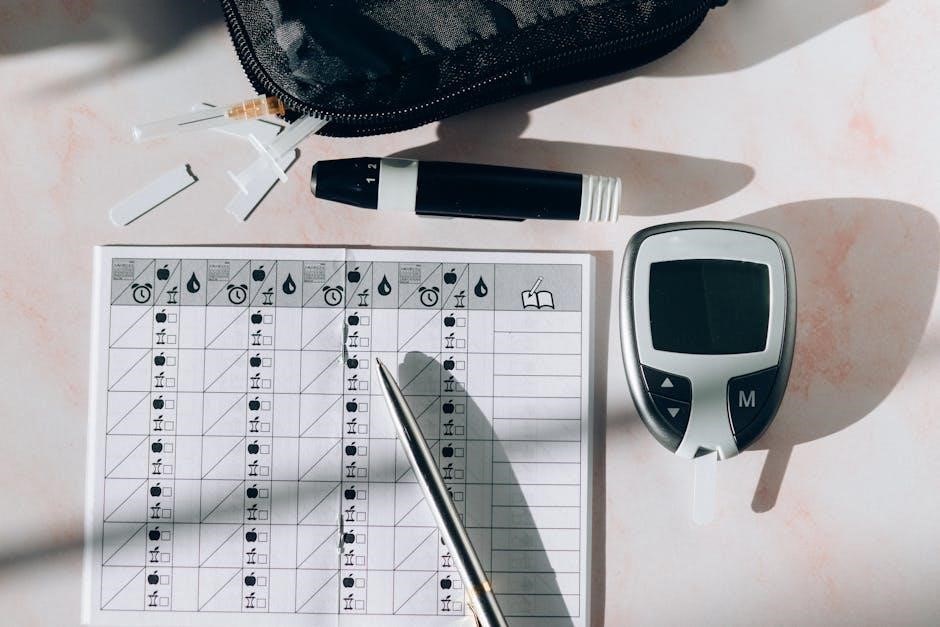
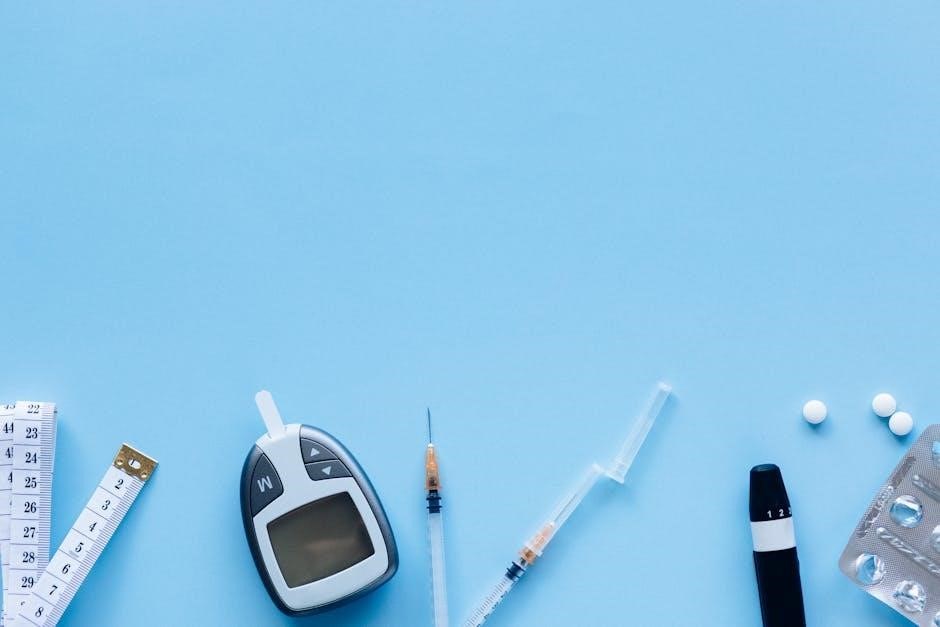
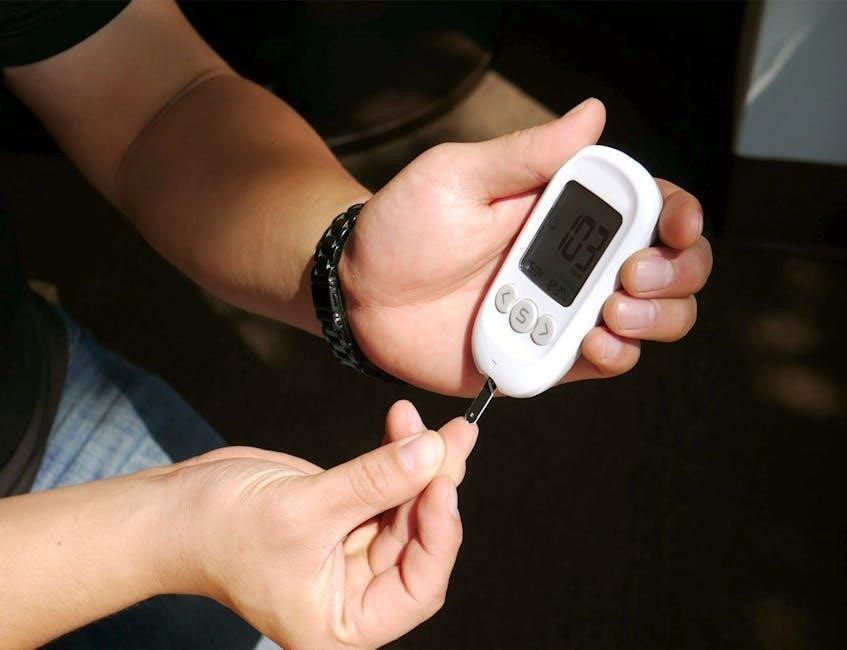
Performing a Blood Glucose Test
To perform a test, ensure the meter is off, insert a test strip, and apply a small blood sample as demonstrated in instructional videos from Sinjune.com.
Preparing for the Test
Before testing, gather your supplies: the FreeStyle Lite meter, a test strip, and a lancing device. Wash your hands thoroughly with soap and warm water, then dry them completely. This ensures accurate results and prevents infection.
Insert a new test strip into the meter; the meter will automatically turn on. Prepare the lancing device with a fresh lancet, adjusting the depth setting as needed for comfortable blood collection.
Applying the Blood Sample
Using the lancing device, gently prick the side of your fingertip. Avoid squeezing the finger excessively, as this can affect the accuracy of the reading. Bring a small drop of blood to the designated area on the test strip.
The meter will automatically begin analyzing the sample once sufficient blood is applied. Ensure the sample fills the test strip’s sample port for reliable results.
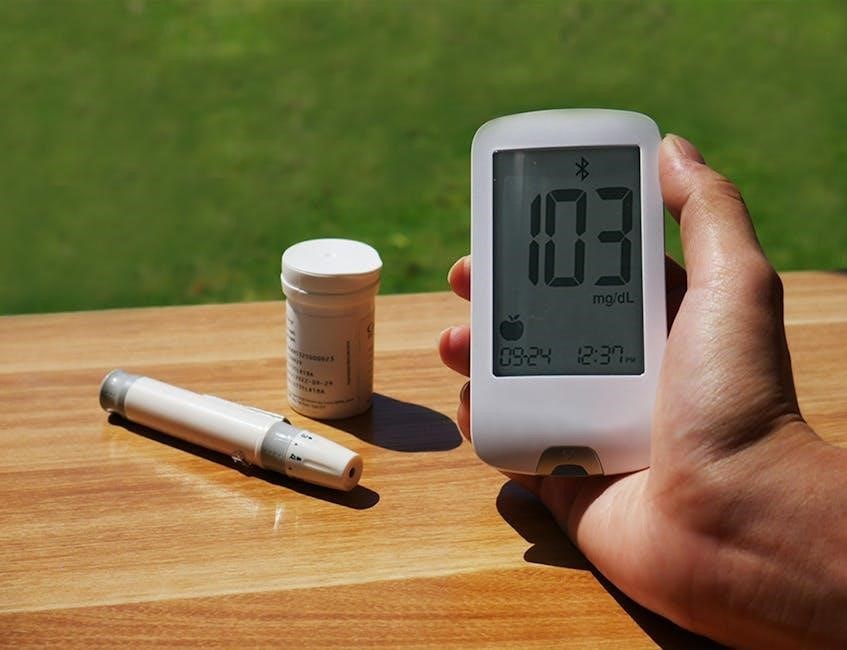
Reading and Interpreting Results
After the analysis, your blood glucose level will be displayed on the meter’s screen. Compare your reading to your target range, as determined by your healthcare provider.
Understanding factors influencing glucose levels – diet, exercise, and medication – is crucial. Refer to the user manual for guidance on interpreting results and recognizing potential high or low readings.
Understanding Test Results
Target blood glucose ranges are individualized; consult your healthcare provider. Various factors, including diet and activity, significantly affect glucose levels, impacting readings.
Target Blood Glucose Ranges
Individualized target ranges are crucial for effective diabetes management, and these should be determined in consultation with your healthcare provider.
Generally, before meals, a target range of 80-130 mg/dL is often recommended, while two hours after starting a meal, less than 180 mg/dL is frequently advised.
However, these are guidelines, and your personal goals may differ based on age, overall health, and other factors.
Factors Affecting Blood Glucose Levels
Numerous factors can influence blood glucose readings, extending beyond just food intake.
Physical activity, stress levels, illness, hydration, and even the timing of your tests all play a significant role.
Medications, both prescribed and over-the-counter, can also impact glucose levels, as can hormonal changes. Consistent monitoring helps identify personal patterns.
Meter Care and Maintenance
Regular cleaning of the FreeStyle Lite meter is essential for accurate readings. Store the meter and test strips in a cool, dry place, away from direct sunlight.
Cleaning the Meter
To ensure accurate results, keep your FreeStyle Lite meter clean. Gently wipe the exterior of the meter with a slightly damp cloth. Avoid using harsh chemicals or abrasive cleaners, as these can damage the device.
Do not immerse the meter in water or any other liquid. Pay particular attention to cleaning the test strip port, ensuring no debris interferes with strip insertion.
Regular cleaning contributes to the longevity and reliability of your meter.
Storing the Meter and Test Strips
Proper storage is crucial for maintaining the accuracy of your FreeStyle Lite system. Store the meter in a clean, dry place, away from extreme temperatures and humidity.
Keep test strips in their original vial, tightly closed, and also in a cool, dry location. Avoid direct sunlight and ensure strips are not exposed to air for extended periods.
Always check the expiration date before use.
Troubleshooting Common Issues
Encountering problems? The FreeStyle Lite manual details error messages and solutions. Inaccurate readings require re-testing, and consulting the user guide is recommended.
Error Messages and Solutions
The FreeStyle Lite meter displays error codes indicating specific issues. Refer to the owner’s booklet for detailed explanations. Common errors might relate to test strip issues, insufficient blood sample, or meter malfunction.
If an error occurs, try re-inserting the strip or repeating the test. If problems persist, consult the Abbott website or customer service for further assistance and troubleshooting steps.
Inaccurate Readings – What to Do
If readings seem inaccurate, first ensure proper testing technique – adequate blood sample, correct strip insertion, and a clean meter. Compare results with a control solution test to verify meter functionality.
Factors like temperature, humidity, and strip expiration can affect accuracy. If inconsistencies continue, contact Abbott customer service for support and potential meter evaluation.
Using Control Solution
Control solution verifies the meter and strips are working correctly. Perform a test when first using the meter, or if inconsistent results occur, ensuring accurate readings.
Why Use Control Solution?
Using control solution confirms your FreeStyle Lite meter and test strips are functioning as expected, providing confidence in your blood glucose results. It’s crucial to test when opening a new vial of strips, or if you suspect inaccurate readings.
This ensures the system delivers reliable data for effective diabetes management. Regularly checking with control solution helps maintain accuracy and peace of mind.
Performing a Control Solution Test
To perform a control solution test, begin with the meter off and insert a test strip. Apply one drop of control solution to the test strip, ensuring complete coverage. The meter will display a result; compare this to the control solution range printed on the vial.
If the result falls within range, your system is functioning correctly.
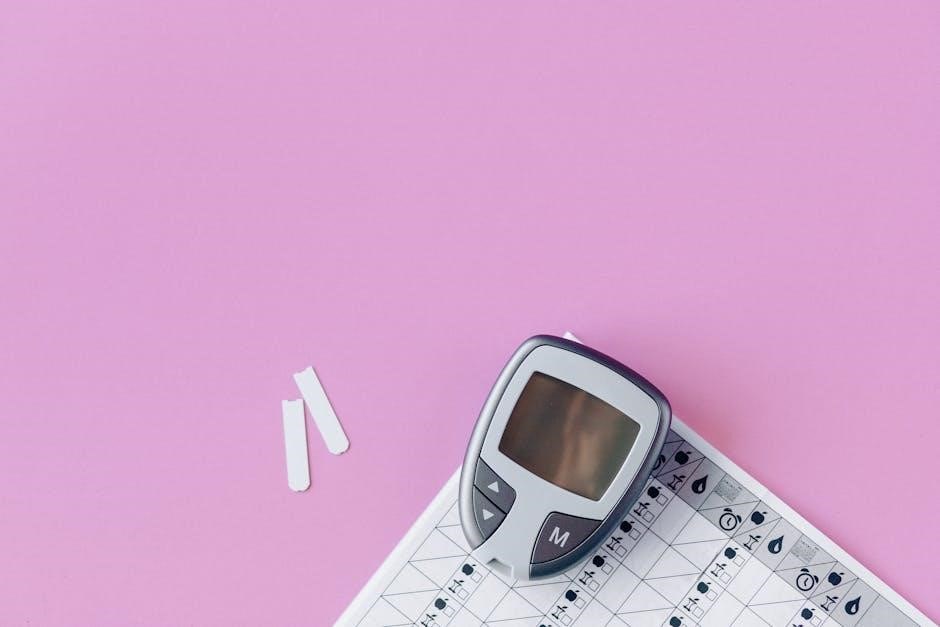
Memory Functions and Data Review
The FreeStyle Lite meter stores test results, allowing access to past readings. It calculates averages, providing valuable insights into glucose management over time for better tracking.
Accessing Test Results Memory
The FreeStyle Lite stores your recent blood glucose readings, enabling you to review your testing history. To access this memory, typically you’ll press and hold the ‘m’ button when the meter is off, but without a test strip inserted.
The meter will then display the most recent result, and subsequent presses of the ‘m’ button will cycle through previously stored values. This allows for convenient tracking and analysis of your glucose levels.
Average Calculation
The FreeStyle Lite automatically calculates averages of your blood glucose readings, providing a helpful overview of your control over time. The meter typically displays 7, 14, or 30-day averages.
Accessing these averages usually involves pressing the ‘m’ button while in the memory mode, cycling through the options until the desired average period is displayed. This feature aids in identifying trends and managing your diabetes effectively.
Reminder Alarms
The FreeStyle Lite allows setting up to four customizable reminder alarms (1-4) to prompt testing. Configure these alarms by pressing the ‘c’ button during meter setup.
Setting Reminder Alarms
To set reminder alarms on your FreeStyle Lite meter, begin with the meter turned off and no test strip inserted. Firmly press and hold the ‘m’ button until you reach the alarm setting screen.
Then, press the ‘c’ (configure) button to access and customize each of the four available alarms. Adjust the time for each alarm to suit your testing schedule, ensuring consistent monitoring.
Adjusting Alarm Settings
Adjusting alarm settings involves navigating the meter’s configuration menu after accessing the reminder alarm function. Use the ‘m’ button to cycle through each of the four available alarms individually.
The ‘c’ (configure) button allows you to modify the time for each alarm, tailoring them to your specific testing needs. Remember to confirm each adjustment to save your personalized settings.
Battery Information
The FreeStyle Lite requires battery replacement when low. Ensure you use the correct battery type for optimal performance and accurate readings, as specified in the owner’s booklet.
Replacing the Battery
To replace the battery, start with the meter turned off and no test strip inserted. Carefully remove the battery cover, typically located on the back of the device. Insert a new battery, observing the correct polarity (+ and -) as indicated inside the compartment.
Ensure the battery is securely seated before replacing the cover. Refer to the owner’s booklet for detailed diagrams and specific instructions for your FreeStyle Lite model.
Battery Type
The FreeStyle Lite meter typically requires a CR2032 3V lithium battery for optimal performance. This battery type is commonly available in pharmacies and electronics stores. Always use a fresh, high-quality battery to ensure accurate readings and reliable operation of your glucose monitoring system.
Dispose of used batteries responsibly, following local regulations.

FreeStyle Lite Test Strips
FreeStyle Lite test strips require proper storage to maintain accuracy. Always check the expiration date before use, and keep strips in a cool, dry place.
Proper Storage of Test Strips
Maintaining test strip integrity is crucial for accurate blood glucose readings. Store FreeStyle Lite test strips in their original vial, tightly closed, in a cool, dry location.
Avoid exposure to extreme temperatures or humidity, and never transfer strips to another container.
Proper storage ensures the strips function correctly, delivering reliable results and supporting effective diabetes management. Discard any damaged or expired strips immediately.
Expiration Dates and Usage
Always check the expiration date on your FreeStyle Lite test strip vial before each use. Do not use expired strips, as they may produce inaccurate results, compromising your blood glucose monitoring.
Once opened, use the strips immediately and reseal the vial tightly.
Discard any strips past their expiration date to ensure reliable and safe diabetes management.
Important Safety Information
Always follow precautions and warnings when using the FreeStyle Lite. Properly dispose of used test strips and lancets to prevent accidental needle sticks and infection.
Precautions and Warnings
Ensure proper use of the FreeStyle Lite meter and test strips, adhering to all instructions. This device is for self-testing only; do not share with others. Consult a healthcare professional for interpretation of results and treatment decisions.
Keep the meter and components out of reach of children. Avoid dropping or subjecting the meter to extreme temperatures or humidity. Always use fresh batteries for accurate readings.
Proper Disposal of Used Test Strips and Lancets
Used test strips and lancets are considered biohazardous waste and require careful disposal. Do not discard them in regular trash. Place used lancets in an FDA-approved sharps container for safe containment.
Follow all local, state, and federal regulations regarding proper disposal of medical waste. Contact your healthcare provider or local waste management for guidance on appropriate disposal methods.
Where to Find Additional Support
For further assistance, explore the Abbott website for resources and frequently asked questions. Direct customer service contact information is readily available online.
The Internet Archive also hosts downloadable user manuals for convenient access.
Abbott Website and Resources
The official Abbott website serves as a primary hub for comprehensive support regarding the FreeStyle Lite meter. Users can access detailed product information, frequently asked questions, and downloadable versions of the user manual, including the 2023 edition.
Furthermore, Abbott provides instructional videos and troubleshooting guides to assist with common issues. These resources aim to empower users with the knowledge needed for accurate and effective blood glucose monitoring, ensuring optimal meter performance and understanding.
Customer Service Contact Information
For personalized assistance with your FreeStyle Lite meter, Abbott provides dedicated customer service channels. While specific contact details aren’t explicitly provided in the sourced materials, the Abbott website is the best starting point to locate current phone numbers and email support options.
Users encountering difficulties beyond the scope of the instruction manual or online resources are encouraged to reach out for direct support from a trained representative, ensuring a positive user experience.