ceiling fan instruction manual
A ceiling fan instruction manual provides essential guidance for installation, maintenance, and troubleshooting. It ensures safe and efficient operation, covering components, safety precautions, and optimal performance tips.
Purpose and Importance of the Manual
The purpose of a ceiling fan instruction manual is to provide a comprehensive guide for safe installation, operation, and maintenance. It ensures users understand safety precautions, electrical requirements, and proper assembly techniques to avoid hazards. The manual also includes troubleshooting tips for common issues and maintenance schedules to prolong the fan’s lifespan. By following the manual, users can ensure optimal performance and energy efficiency, making it an essential resource for years to come.
Safety Precautions and Warnings
Always follow safety guidelines to prevent accidents. Avoid inserting objects between rotating blades and refrain from bending blade arms during installation or maintenance. Ensure the fan is mounted to a sturdy, approved outlet box to reduce fire or shock risks. Do not modify the fan or use unauthorized parts, as this can void the warranty and create hazards. Adhering to these precautions ensures safe operation and optimal performance of your ceiling fan.
Pre-Installation Checklist
Verify all parts are included, ensure the outlet box is secure, and confirm power is off. Check fan compatibility with your ceiling type and ensure proper ventilation.
Tools and Materials Required
For a successful ceiling fan installation, gather essential tools: screwdrivers (Phillips and flathead), wrench or pliers, voltage tester, ladder, and wire strippers. Materials needed include screws, washers, and mounting hardware. Ensure all components from the fan kit are included, such as blades, motor, and light accessories. Double-check the manual for specific requirements to avoid missing items. Proper tools ensure safety and efficiency during the installation process.
Understanding Fan Components and Accessories
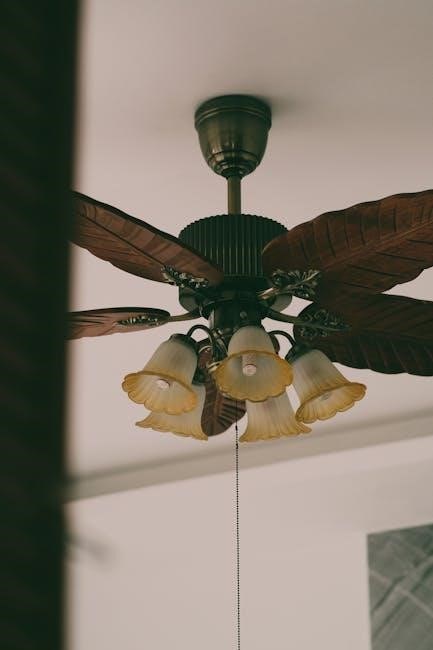
Familiarize yourself with the ceiling fan’s components: motor housing, fan blades, mounting bracket, downrod, and light kit. Accessories like remote controls or wall switches enhance functionality. Each part serves a specific role, ensuring proper operation and safety. Understanding these components helps in troubleshooting and maintenance, as outlined in the manual. Ensure all parts are included and undamaged before starting installation for optimal performance and longevity of your ceiling fan.
Installation Process
The installation process requires careful preparation, including turning off power, ensuring proper mounting, and following step-by-step guidelines. Refer to the manual for safe and efficient setup.
I apologize for the earlier oversight. Here’s the correct response:
Step-by-Step Guide to Installing the Ceiling Fan
Begin by turning off the power supply at the circuit breaker. Carefully remove the old fixture and install the mounting bracket. Attach the fan motor to the bracket, ensuring all screws are securely tightened. Connect the electrical wires according to the manual, typically matching black to black and white to white. Mount the fan blades and balance them for smooth operation. Finally, restore power and test the fan at different speed settings to ensure proper function.
Connecting Electrical Components Safely
Ensure the power is off at the circuit breaker before starting. Identify and match the wires by color: black (hot) to black, white (neutral) to white, and copper (ground) to ground. Secure all connections with wire nuts or connectors. Double-check for loose wires and tape any exposed ends. Consult the manual for specific wiring diagrams, and consider hiring a licensed electrician if unsure. Proper connections ensure safe and efficient fan operation, preventing electrical hazards.
Troubleshooting Common Installation Issues
Common issues include wobbling, noise, or the fan not turning on. Check if the fan is properly balanced and all screws are tightened. Ensure the motor is securely mounted and the blades are evenly spaced. If the fan doesn’t start, verify electrical connections and circuit breaker status. For noise, inspect for loose parts or debris. Refer to the manual’s troubleshooting section for specific solutions and diagrams to resolve issues efficiently and safely.

Operating the Ceiling Fan
Operate your ceiling fan by using the remote or wall control to adjust speed and direction. Switch modes (normal/reverse) for seasonal comfort and energy efficiency.
Understanding Fan Modes (Normal and Reverse)
Ceiling fans operate in two primary modes: Normal and Reverse. In Normal mode, the fan spins counterclockwise, creating a cooling breeze by circulating air downward. This is ideal for summer months when you want to feel cooler without lowering the thermostat. In Reverse mode, the fan spins clockwise, which helps distribute warm air more evenly throughout the room during winter, making your space feel cozier. Switching between modes is typically done via a switch on the motor housing or remote control. This dual functionality enhances year-round comfort and energy efficiency by reducing the need for extreme temperature adjustments. Regular use of both modes can also help maintain consistent air circulation, improving indoor air quality and overall room climate.
Using the Remote Control (If Applicable)
The remote control offers convenient operation of your ceiling fan, allowing you to adjust settings without physical access to the fan. Basic functions typically include turning the fan on/off, adjusting speed settings, and controlling the light kit if applicable. Some remotes also enable mode switching between normal and reverse. Ensure the remote is properly synced with the fan during installation. Batteries are usually required, and replacement instructions are provided in the manual. Regularly check battery life for uninterrupted use.
Adjusting Speed Settings for Optimal Performance
Adjusting the speed settings on your ceiling fan ensures efficient airflow and energy savings. Most fans offer multiple speed options, which can be controlled via the remote or wall switch. Lower speeds are ideal for circulating air gently, while higher speeds provide maximum cooling. Experiment with settings to find the optimal balance for comfort and energy efficiency. Proper speed adjustment enhances performance and extends the fan’s lifespan by reducing motor strain during operation.
Maintenance and Care
Regular maintenance ensures your ceiling fan operates efficiently and lasts longer. Clean blades, balance them for smooth operation, and inspect parts for wear or damage periodically.
Cleaning the Fan Blades and Housing
Regular cleaning is crucial for maintaining your ceiling fan’s efficiency and appearance. Dust the blades and housing with a soft cloth or sponge. For tougher dirt, use a damp cloth, but avoid harsh chemicals. Ensure the fan is turned off before cleaning to prevent accidents. Wipe down the motor and light fixtures gently. Avoid using abrasive materials that could scratch the finish. Dry the fan thoroughly after cleaning to prevent water spots. Regular cleaning improves airflow and keeps your fan running smoothly.
Balancing the Fan Blades for Smooth Operation
Properly balancing your ceiling fan blades ensures quiet and smooth operation. Start by inspecting each blade for even alignment and weight distribution. If a blade is bent, gently adjust it to its correct position. Use a balancing kit, often provided with the fan, to identify and correct imbalances. Attach weights to the lighter blade until the fan operates evenly. After adjustments, test the fan at different speeds to ensure stability and minimal vibration. Regular balancing prevents wobbling and enhances performance.
Inspecting and Replacing Parts as Needed
Regularly inspect your ceiling fan for worn or damaged parts. Check the blades, light kit, and glass for cracks or dirt. Tighten any loose screws and ensure all electrical connections are secure. If a part is damaged, replace it immediately using manufacturer-approved components. Replace worn-out bearings or faulty motors to maintain smooth operation. Always turn off the power before inspecting or replacing parts. Refer to the manual for specific instructions on disassembling and reassembling components safely and correctly;
Tips for Energy Efficiency
Ceiling fans help reduce energy consumption by circulating air, lowering cooling demands. Use the correct fan size for your room and run it counterclockwise in summer. In winter, switch to clockwise to redistribute warm air. Adjust speed settings to optimize efficiency and turn off the fan when not in use. Proper maintenance ensures smooth operation and maximizes energy-saving benefits, aligning with seasonal maintenance tips for maximum efficiency.
Using Ceiling Fans to Reduce Energy Consumption
Ceiling fans circulate air, making rooms feel cooler in summer and warmer in winter. This allows you to raise the thermostat in summer and lower it in winter, reducing energy use. Running fans in counterclockwise mode during summer creates a cooling breeze, while clockwise operation in winter redistributes warm air. Using the right fan size for your room and optimizing speed settings further enhances efficiency. Proper maintenance ensures smooth operation, maximizing energy-saving benefits and lowering utility costs effectively.
Seasonal Maintenance Tips for Maximum Efficiency
Seasonal maintenance ensures your ceiling fan operates efficiently year-round. In summer, clean fan blades to improve airflow and balance for smooth operation. In winter, run the fan in reverse at a low speed to circulate warm air. Regularly inspect and tighten screws, and lubricate moving parts if needed. Replace worn-out components promptly to maintain performance. Follow the manual’s guidelines for seasonal adjustments and cleaning to keep your fan running efficiently and prolong its lifespan while saving energy.
Troubleshooting Common Issues
Identify and resolve common ceiling fan issues by checking for loose connections, balancing blades, and ensuring proper installation. Refer to the manual for detailed solutions and safety guidelines to address noise, vibration, or malfunctioning parts effectively.
Identifying and Resolving Noise Problems
Noise issues in ceiling fans are often caused by loose screws, unbalanced blades, or worn-out parts. Start by tightening all screws and bolts. Check for blade misalignment or damage. If the fan wobbles, balance the blades by adjusting the mounting hardware or replacing uneven blades. Lubricate moving parts if necessary. Ensure the motor housing is secure and free from debris. For persistent noise, consult the manual or contact a professional for further inspection and repair.
Fixing a Malfunctioning Fan Motor or Light
If the fan motor stops working, check the power supply and ensure all electrical connections are secure. Verify the circuit breaker hasn’t tripped. For flickering lights, replace faulty bulbs or check connections. If the motor hums but doesn’t spin, inspect for blockages. Refer to the manual for specific troubleshooting steps. If issues persist, consider replacing the motor or light kit. Always turn off power before attempting repairs to ensure safety and prevent further damage.

Warranty and Support Information
Most ceiling fans come with a manufacturer’s warranty covering parts and labor for a specified period. Refer to the manual for details on warranty terms and conditions. Contact customer support for assistance with repairs, replacements, or troubleshooting. Ensure all claims are made within the warranty period and retain the purchase receipt for validation.
Understanding the Manufacturer’s Warranty
The manufacturer’s warranty typically covers defects in materials and workmanship for a specified period, often ranging from one to five years. This warranty may include coverage for parts, labor, or both, depending on the terms. It is essential to review the warranty document provided with your ceiling fan to understand the scope of coverage, including any limitations or exclusions. Proper registration and adherence to the manual’s guidelines are usually required to maintain warranty validity. Contacting customer support for warranty claims ensures timely resolution.
How to Contact Customer Support
To contact customer support, refer to the contact information provided in your ceiling fan manual. Most manufacturers offer phone numbers, email addresses, or website links for assistance. Online support portals may also include FAQs, troubleshooting guides, and downloadable resources. For efficient service, have your product model number and purchase details ready. Representatives are typically available during business hours to address warranty claims, repair inquiries, and operational questions. Visit the official website for the most direct support options.
Thank you for purchasing your ceiling fan. By following the manual, you ensure safe and proper usage, optimizing energy efficiency and longevity. Enjoy your product responsibly!
Final Tips for Enjoying Your Ceiling Fan
Regularly clean the blades and housing to maintain efficiency and aesthetics. Use the fan in both normal and reverse modes for seasonal comfort. Adjust speed settings wisely to optimize energy savings. Ensure proper balancing for smooth operation and minimal noise. Always refer to the manual for troubleshooting common issues. By following these tips, you can maximize your ceiling fan’s performance and enjoy a comfortable, energy-efficient space year-round.
Encouraging Proper Usage and Care
Encourage users to follow the manual for optimal performance and longevity. Regular maintenance, such as cleaning blades and checking balance, ensures smooth operation. Teach users to adjust modes seasonally and use energy-saving features. Emphasize safety by avoiding object insertion and proper installation. Promote eco-friendly habits by utilizing fan modes to reduce energy consumption. Proper care and usage not only extend the fan’s life but also enhance comfort and efficiency in any room.